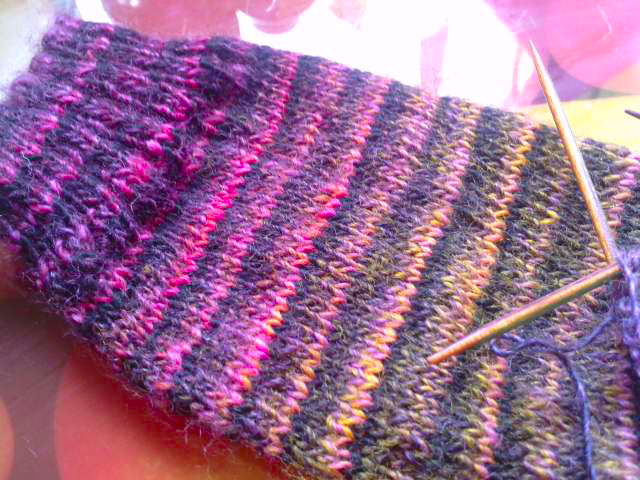
You can *never* have too many socks! The ones above were crocheted and really quick and easy to do from a pattern kindly sent to me by a member of a friendly little forum I visit.
The sock above and below is knitted and vastly slower but I love it so far ... So far, I have only ever knitted one other sock in my life and was so relieved to get to the end of it that I couldn't face the second one! This time, I'm just plodding, plodding, plodding on ... I *have* to complete the pair this time!
After all that, biscuits are in order ... Anzac biscuits. I'll post the recipe when I have a minute to dig it out :~)
Sunday, 8 May 2011
Monday, 11 April 2011
Busy baking day
| Left: Barleycorn loaf - Right: Huge Granary loaf |
I ended up making two huge wholemeal Granary loaves (one for the freezer), a Barleycorn loaf which was lovely and light (also in the freezer), two brioche loaves and a River Cottage sourdough loaf.
| Barleycorn loaf |
| A's lovely pair of baps ;~) |
| Left: Barleycorn loaf - Right: Brioche loaf |
| Sourdough loaf made using Hugh Fearnley-Whittingstall's recipe |
| Sourdough loaf |
I tried making the sponge last night and baked the loaf today. I haven't cut into it yet or tasted it but it looks good ... :~)
It's been a nice day today - hectic and tiring but good. C and F enjoyed making a rock band with a guitar (with two strings missing), cake tins and chop sticks. They were rocking to the Almighty (very loudly!) and looked perfectly happy :~)
| Minted new potatoes for dinner :~) |
Sunday, 10 April 2011
Allotment work and foraging for lunch
| Ladybird in the grass |
| Planting onions |
| Hot, hot sun |
| Budding bushes |
| Blossom |
| Goldengage branches |
| Apple blossom |
| Wild nettles |
| Cleavers and nettles growing together |
| Omelette cooking |
| Ready for lunch :~) |
The rhubarb was turned into a crumble for after the roast :~) I cook the rhubarb with a little extra water, sugar and a teaspoon of ground ginger. Before adding the cooked rhubarb to the crumble dish, I drain the bright pink liquid off and store it in a bottle. It will keep in the fridge for a couple of days and it's delicious when mixed with lemonade and a sprig of mint. S has been enjoying it this afternoon and looks very sophisticated supping pink fizz from a wine glass!
| First rhubarb of the year |
| Rhubarb, ginger and lemonade |
| Broad beans ready for sowing |
Saturday, 9 April 2011
Gingernuts
Years ago, I used to bake dozens of Gingernuts every few weeks. It must have been the perfect recipe because they turned out brilliantly ... buttery, with just the right amount of chewiness and with that rough, craggy look on top that they should have.
I guess we must have all got fed up with Gingernuts at some point because I didn't make them for a while and we've moved house a couple of times since then. Now, of course, I can't remember which book the recipe is in and I've searched and searched all my recipe books but just can't find it. Actually, that was a big part of the motivation for starting this blog - I really wanted somewhere where I could record recipes, etc. that I'm currently using and have something to refer back to.
This is the recipe I'm currently using which is quite nice but just isn't quite as good as the original:
8oz (225g) plain flour
1/2 tsp bicarbonate of soda
1 tblsp ground ginger
1/2 tsp mixed spice
4oz (125g) butter
6oz (185g) sugar
2 fl oz (60ml, 1/4 cup) water
1 tblsp syrup
Preheat the oven to Gas 4 (180C) and line a couple of baking sheets with baking paper.
Stir together the flour, bicarbonate of soda and spices. In a small pan, heat together the butter, sugar, syrup and water until melted. Stir the liquid in to the dry ingredients until well combined. Place flattened spoonfuls onto the baking sheets and bake until golden for around 15 minutes. Allow to cool and firm up for 10 minutes before transferring to a cooling rack.
I guess we must have all got fed up with Gingernuts at some point because I didn't make them for a while and we've moved house a couple of times since then. Now, of course, I can't remember which book the recipe is in and I've searched and searched all my recipe books but just can't find it. Actually, that was a big part of the motivation for starting this blog - I really wanted somewhere where I could record recipes, etc. that I'm currently using and have something to refer back to.
| Gingernuts for lunchboxes and school snacks |
This is the recipe I'm currently using which is quite nice but just isn't quite as good as the original:
8oz (225g) plain flour
1/2 tsp bicarbonate of soda
1 tblsp ground ginger
1/2 tsp mixed spice
4oz (125g) butter
6oz (185g) sugar
2 fl oz (60ml, 1/4 cup) water
1 tblsp syrup
Preheat the oven to Gas 4 (180C) and line a couple of baking sheets with baking paper.
Stir together the flour, bicarbonate of soda and spices. In a small pan, heat together the butter, sugar, syrup and water until melted. Stir the liquid in to the dry ingredients until well combined. Place flattened spoonfuls onto the baking sheets and bake until golden for around 15 minutes. Allow to cool and firm up for 10 minutes before transferring to a cooling rack.
Canned Bolognese sauce
USDA recipe for spaghetti sauce with meat to make 9 pint jars:
30lbs tomatoes
2 1/2 lbs minced beef
5 cloves garlic
1 cup chopped onions
1 cup chopped green pepper or celery
1lb mushrooms, sliced (optional)
4 tblsp chopped parsley
1/4 cup sugar
2 tbsp dried oregano
4 tsp salt
2 tsp ground black pepper
Optionally add water for a thinner sauce.
Method:
Brown the beef and drain off the fat. Add the garlic, onions, green peppers and mushrooms. Sauté for around 3 minutes until tender. Add the tomatoes, herbs, sugar and seasoning. Add water if a thinner sauce is wanted. Bring to the boil and boil for 5 minutes.
Ladle into hot jars with 1 inch headspace. Process at 10lb pressure for 60 minutes.
My version which made 13 pint jars in the end:
3 quarts (roughly) of a mixture of chopped fresh and tinned tomatoes
3lb minced beef
Handful dried garlic flakes
2 chopped onions
1 chopped green pepper
1 chopped stick celery
1lb mushrooms, sliced
2 handfuls dried italian herb mix
3 Kallo beef stock cubes
Generous amount of freshly ground black pepper
1 cup red wine
I was careful to leave the inch headspace this time and then processed the jars at 11lb (nearer 12lb actually) for 75 minutes, just because that's what worked well for the chilli and I'd much rather over process than under.
The quality isn't great in the video above but it's showing the inside of the canner after it had been left to cool and de-pressurise. The jars were still boiling like mad! I'm not sure how long this was after I'd turned it off ... maybe half an hour? Just goes to show how incredibly hot it gets in there! Being much more careful about the headspace worked because the jars didn't overflow this time.
I used three of the jars in a pasta bake for the Munchkins last night and it all got polished off with several coming back for seconds so I'll take that as a thumbs up for the sauce :~)
30lbs tomatoes
2 1/2 lbs minced beef
5 cloves garlic
1 cup chopped onions
1 cup chopped green pepper or celery
1lb mushrooms, sliced (optional)
4 tblsp chopped parsley
1/4 cup sugar
2 tbsp dried oregano
4 tsp salt
2 tsp ground black pepper
Optionally add water for a thinner sauce.
Method:
Brown the beef and drain off the fat. Add the garlic, onions, green peppers and mushrooms. Sauté for around 3 minutes until tender. Add the tomatoes, herbs, sugar and seasoning. Add water if a thinner sauce is wanted. Bring to the boil and boil for 5 minutes.
Ladle into hot jars with 1 inch headspace. Process at 10lb pressure for 60 minutes.
| Jar of hot Bolognese sauce before sealing and processing |
My version which made 13 pint jars in the end:
3 quarts (roughly) of a mixture of chopped fresh and tinned tomatoes
3lb minced beef
Handful dried garlic flakes
2 chopped onions
1 chopped green pepper
1 chopped stick celery
1lb mushrooms, sliced
2 handfuls dried italian herb mix
3 Kallo beef stock cubes
Generous amount of freshly ground black pepper
1 cup red wine
I was careful to leave the inch headspace this time and then processed the jars at 11lb (nearer 12lb actually) for 75 minutes, just because that's what worked well for the chilli and I'd much rather over process than under.
The quality isn't great in the video above but it's showing the inside of the canner after it had been left to cool and de-pressurise. The jars were still boiling like mad! I'm not sure how long this was after I'd turned it off ... maybe half an hour? Just goes to show how incredibly hot it gets in there! Being much more careful about the headspace worked because the jars didn't overflow this time.
I used three of the jars in a pasta bake for the Munchkins last night and it all got polished off with several coming back for seconds so I'll take that as a thumbs up for the sauce :~)
Tuesday, 5 April 2011
Canning Chilli
| Three boxes of Kilner jars!!! |
For anyone who isn't familiar with canning or canners, it's basically a big pressure cooker which you use on the stovetop. You put the food into Kilner jars, put them inside the canner with several inches of water and pop the lid on the canner. You bring the water to the boil and let it "vent" through the steam vent for ten minutes to get rid of any air in the canner. After that time, you put a regulator weight over the steam vent and let the pressure begin building. The pressure you need to get it to depends on your altitude - the way a canner works is by getting the jars and food well above normal boiling point to kill off any bacteria (including botulism, which normal boiling temperature doesn't kill) and create a vacuum in the jars to seal them.
I picked up three dozen Kilner jars (£30, bargain!) on Sunday and tried out canning for the first time ... Chilli Con Carne. It's recommended that you only use recipes which have been fully tested by the USDA so that safe canning is then pretty failsafe - they've tested the pressure needed and the processing time.
| Heaven :~) |
3 cups dried pinto or red kidney beans
5-1/2 cups water
5 tsp salt (separated)
3 lbs ground beef
1-1/2 cups chopped onions
1 cup chopped peppers of your choice (optional)
1 tsp black pepper
3 to 6 tbsp chili powder
2 quarts crushed or whole tomatoes
Yield: 9 pints
Procedure: Wash beans thoroughly and place them in a 2 qt. saucepan. Add cold water to a level of 2 to 3 inches above the beans and soak 12 to 18 hours. Drain and discard water. Combine beans with 5-1/2 cups of fresh water and 2 teaspoons salt. Bring to a boil. Reduce heat and simmer 30 minutes. Drain and discard water. Brown ground beef, chopped onions, and peppers (if desired), in a skillet. Drain off fat and add 3 teaspoons salt, pepper, chili powder, tomatoes and drained cooked beans. Simmer 5 minutes. Caution: Do not thicken. Fill hot jars, leaving 1-inch headspace. Remove air bubbles and adjust headspace if needed. Wipe rims of jars with a dampened clean paper towel. Adjust lids and process.
Here's the recipe using UK measurements and tinned kidney beans instead of dried and a few different flavourings:
3lbs lean minced beef
2 medium onions, chopped
1 green pepper, finely chopped
2 fresh red chillis, deseeded and very finely chopped
Generous amount freshly ground black pepper
2 1/2 level teaspoons salt
Handful of dried garlic flakes
2 tsp ground cumin
3 tblsp hot chilli powder
64 fl oz (just over 3 pints) tinned chopped tomatoes
3 400g tins kidney beans, drained and rinsed
The method I used was the same as above.
| Jar of Chilli before processing |
| Jars in the canner ready for processing |
| Up to pressure |
| My canner :~) |
| Jars in the canner after processing - can you see the slight staining of the water? |
| Jar of Chilli after processing |
| Leaked Chilli under the ring |
Friday, 1 April 2011
Friday night
| Small dog ... |
| Pairs of dogs waiting for treats :~) |
| Homemade pizzas |
| Fresh yeast |
| ... and a bottle of Rioja ... a good Friday night :~) |
Subscribe to:
Posts (Atom)